
Building your own gaming computer is one of the best ways to maximize performance while staying within budget. If you’re wondering how to build a gaming PC under $1000 step by step, this complete guide will walk you through everything — from choosing components to final setup.
With smart part selection and careful assembly, you can build a powerful 1080p or even 1440p gaming machine without overspending.
Why Build a Gaming PC Instead of Buying One?
Prebuilt systems often include:
- Lower-quality power supplies
- Limited upgrade options
- Higher prices for similar performance
When you build your own PC, you get:
- Better performance per dollar
- Higher-quality components
- Full customization
- Easy future upgrades
Now let’s get started.
Step 1: Set a Smart $1000 Budget Allocation
To build a gaming PC under $1000, divide your budget wisely:
| Component | Recommended Budget |
|---|---|
| GPU | $350–$450 |
| CPU | $180–$250 |
| Motherboard | $100–$150 |
| RAM | $60–$100 |
| Storage | $60–$100 |
| Power Supply | $70–$120 |
| Case | $50–$100 |
Your graphics card (GPU) should receive the largest portion of the budget since gaming performance depends heavily on it.
Step 2: Choose the Right Components
Below is a strong example configuration for a sub-$1000 gaming PC build in 2026.
1. Processor (CPU)
Recommended Option: AMD Ryzen 5 7600
Why?
- Excellent gaming performance
- 6 cores / 12 threads
- Great value for mid-range builds
Alternative: Intel Core i5-13400F
Both CPUs are perfect for high-refresh 1080p gaming.
2. Graphics Card (GPU)
Recommended Option: NVIDIA GeForce RTX 4060
Why?
- Strong 1080p and entry 1440p performance
- DLSS support
- Power efficient
Alternative: AMD Radeon RX 7600
Your GPU is the most important component for gaming performance.
3. Motherboard
Choose a compatible motherboard:
- B650 for Ryzen 7000 series
- B760 for Intel 13th Gen
Look for:
- At least 2 M.2 slots
- 4 RAM slots preferred
- Built-in WiFi (optional)
4. RAM
Minimum recommendation:
- 16GB (2x8GB) DDR5
16GB is ideal for gaming in 2026. Avoid single-stick RAM configurations.
5. Storage
Recommended:
- 1TB NVMe SSD
This ensures fast game load times and system responsiveness.
6. Power Supply (PSU)
Choose:
- 650W 80+ Bronze or Gold
- From a reputable brand
Never cheap out on the power supply. It protects your entire system.
7. PC Case
Look for:
- Good airflow
- Mesh front panel
- At least 2 pre-installed fans
Airflow is critical for gaming performance and long-term durability.
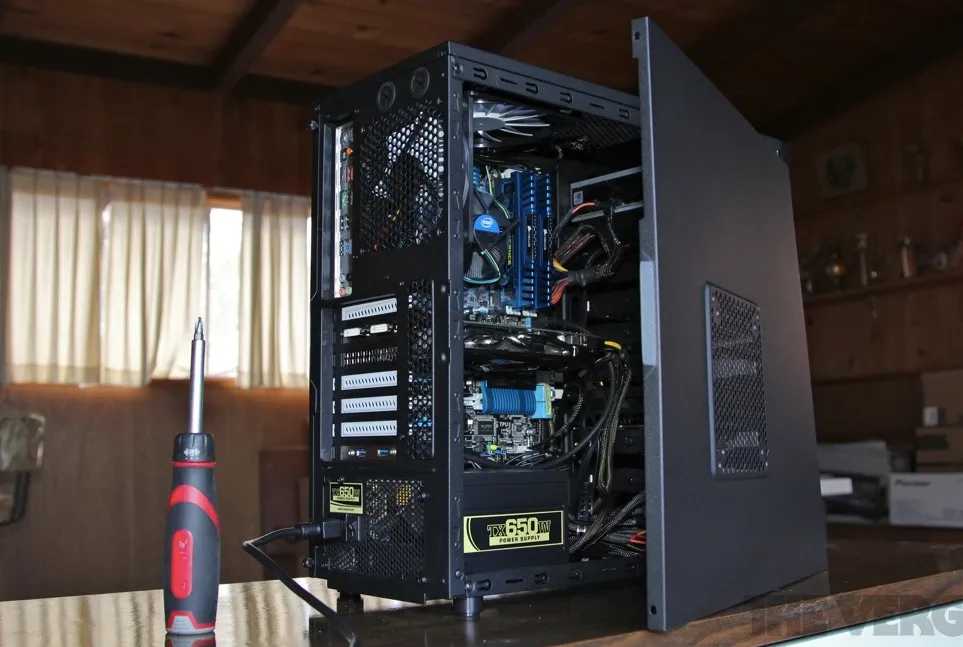
Step 3: Assemble the PC (Step-by-Step Guide)
Now that you have your components, follow these assembly steps carefully.
Step 3.1: Install the CPU
- Open the CPU socket lever
- Align the triangle on the CPU with the motherboard marker
- Gently place it in — do not force
- Lock the lever
Step 3.2: Install RAM
- Open RAM slot clips
- Align the notch correctly
- Press firmly until it clicks
Use slots 2 and 4 for dual-channel performance.
Step 3.3: Install M.2 SSD
- Remove M.2 screw
- Insert SSD at a 30-degree angle
- Press down and screw it in place
Step 3.4: Mount Motherboard in Case
- Install motherboard standoffs
- Place motherboard carefully
- Screw it in evenly
Step 3.5: Install Power Supply
- Insert PSU at bottom (fan facing vent)
- Secure with screws
- Route cables neatly
Step 3.6: Install GPU
- Remove PCIe slot covers
- Insert GPU into top PCIe slot
- Secure with screws
- Connect PCIe power cables
Step 3.7: Connect Front Panel Cables
Carefully connect:
- Power switch
- Reset switch
- USB
- Audio
Refer to your motherboard manual.
Step 4: First Boot & BIOS Setup
After assembly:
- Connect monitor and keyboard
- Turn on power
- Enter BIOS
- Enable XMP/EXPO for RAM
- Check temperatures
If everything works, install Windows or your preferred operating system.
Step 5: Install Drivers and Optimize
Install:
- GPU drivers
- Chipset drivers
- Windows updates
Then adjust:
- Game settings
- NVIDIA/AMD control panel settings
- Fan curves if needed
Expected Gaming Performance Under $1000
With the recommended build, you can expect:
- 1080p Ultra settings in most games
- 144+ FPS in esports titles
- Smooth 1440p High settings in many AAA games
This makes it an excellent value gaming system.
Market Considerations in 2026
Component pricing has been influenced by supply chain shifts and the ongoing Challenges Facing Today’s Chip Manufacturers, which occasionally impact GPU and CPU availability. However, the sub-$1000 range remains the sweet spot for performance-to-price ratio.
Planning your purchase around sales and seasonal discounts can help maximize value.
Common Mistakes to Avoid
- Overspending on RGB instead of performance
- Buying a weak power supply
- Forgetting airflow
- Skipping dual-channel RAM
- Not checking component compatibility
FAQs – How to Build a Gaming PC Under $1000 Step by Step
1. Is $1000 enough for a good gaming PC in 2026?
Yes. A well-planned $1000 build can handle 1080p ultra settings and strong 1440p performance.
2. Should I prioritize CPU or GPU?
GPU. Gaming performance relies more heavily on the graphics card.
3. Is building a PC difficult?
Not really. If you follow instructions carefully, it’s straightforward and beginner-friendly.
4. How long will a $1000 gaming PC last?
With proper upgrades (like future GPU swaps), it can last 4–6 years for gaming.
5. Can I upgrade later?
Yes. That’s one of the biggest advantages of building your own PC.
Final Thoughts
Now you know exactly how to build a gaming PC under $1000 step by step. By focusing your budget on the GPU, choosing a strong mid-range CPU, and assembling carefully, you can build a powerful system that outperforms many prebuilt options.
